This article may contain affiliate/compensated links. For full information, please see our disclaimer here.
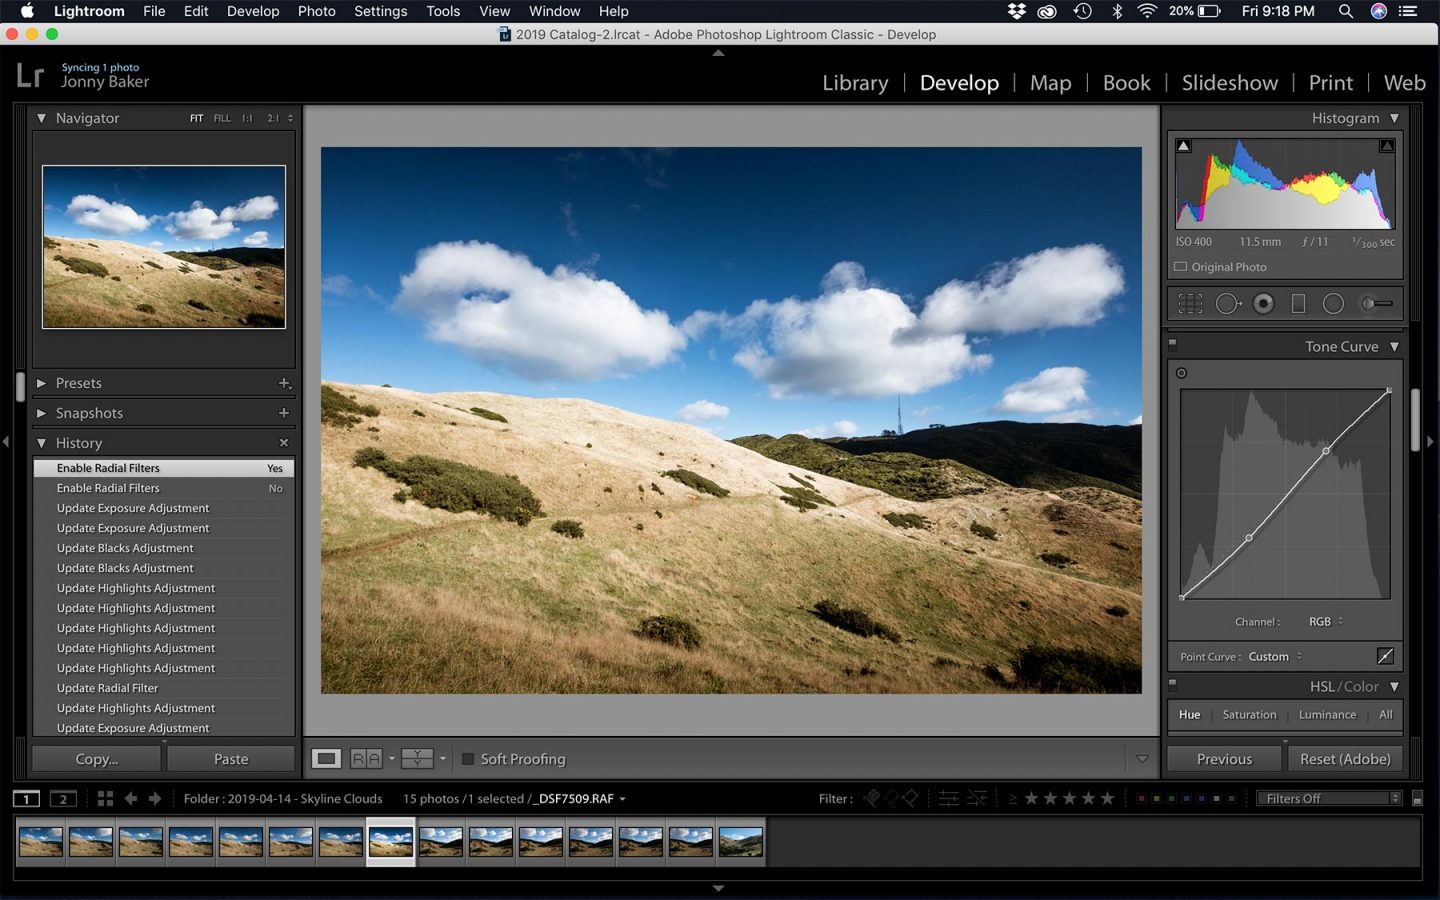
Today we are going to be looking at 13 really helpful Lightroom hacks that you can use to improve your user-experience and productivity. Lightroom is an extremely powerful program that is crammed full of features to make your life a heck of a lot easier when editing your photos.
With this list I have tried to include some of the lesser known features and shortcuts in Lightroom, all of which will help you to start using Lightroom more effectively and efficiently. Keep in mind that there are loads more useful features, I’ve just included the ones that I find most helpful so let’s dive straight in.
- Lightroom Hacks That Will Blow Your Mind
- 1) Change The Mask Colours
- 2) Highlight And Shadow Clipping Shortcut
- 3) Match Total Exposures
- 4) Solo Mode
- 5) Visualize Spots
- 6) Change Crop Overlay
- 7) Preview Clipping When Adjusting Exposure
- 8) Auto Mask Shortcut
- 9) Dim Lightroom Using L
- 10) Change Background Colour Of Lightroom
- 11) Preview Split Tone Colours
- 12) Before and After
- 13) Change Amount Of Adjustment Filters
- Final Thoughts
Lightroom Hacks That Will Blow Your Mind
1) Change The Mask Colours
Did you know that you can change the colour of the mask when applying a local adjustment, for instance when you apply an adjustment using the radial filter, graduated filter or adjustment brush? By default it will display as red but you can also change it to green, grey and black.
In order to do this, simply press shift + O. You can also toggle the mask on and off by pressing O as a shortcut. Changing the colour of the mask can be really helpful if you are applying the local adjustment to something that is the same colour as the mask. For instance, if you are adding a graduated filter to an image that has a red sky, it can be quite hard to see the red mask. Being able to change the mask to green will make it a lot easier to see where the mask starts and ends.

2) Highlight And Shadow Clipping Shortcut
If you want to see if anything in your photos is too overexposed or underexposed, you can show the clipping warning. With the clipping warning on, you can see if any of the highlights are blown out with a red indicator and if any of the shadows are blocked, blue will appear. This can be especially helpful when you are making adjustments to aspects of your images such as the exposure, highlights and shadows. It means that you will be able to see if you’re taking the exposure a little too far. You can enable the clipping warning by simply pressing the shortcut J.

3) Match Total Exposures
If you like to bracket the exposures of your photos when shooting, then this might be a very useful Lightroom hack for you. Say you have an image that you have edited and you have lots of different bracketed exposures of the same photo, there is actually a way you can match the exposures. To do this, make sure you are in the develop window and you have selected the photo you would like to use as your base exposure. Then select the other photos that you want to match the exposure of. Then all you need to do is click Settings and Match Total Exposures. From here you can sit back and watch Lightroom perform its magic to match the exposures of all the photos you selected.

4) Solo Mode
Solo Mode can be a really helpful feature if you want to tidy up the right side of your develop panel. Solo Mode basically means that only one of your adjustment panels will be open at any one time. This means that you don’t have to scroll through every adjustment panel to get to the one you want.
To activate Solo Mode simply right hand click on one of the adjustment panels, for example basic. A dialog box will pop up, click on Solo Mode and your panel will only show the adjustment panel that you click on.

5) Visualize Spots
Visualize Spots is one of the Lightroom hacks that really did blow my mind when I saw it in action. It is an amazing feature that helps you to remove any dust spots or imperfections from your photos when using the spot removal tool. When you are using the spot removal tool you will see a check box under the photo that allows you to turn Visualize Spots on. When you select Visualize Spots the image is inverted, this allows you to see spots and imperfections a lot clearer. Next to the check box you will see a slider, this allows you to change the contrast levels of the tool, and this helps you to see the spots in greater or lesser detail. This all allows you to be extremely precise without too much effort so that you can have your photos clear of any imperfections.

6) Change Crop Overlay
When you’re cropping your photos using Lightroom, the overlay on the crop can be really helpful. There are lots of different overlays to help you get the perfect crop, such as grids, the rule of thirds and golden ratio. If you press O while you are using the crop tool you can change between 7 different overlays to see which one might work best. If you want to rotate the overlay, press shift + O.

7) Preview Clipping When Adjusting Exposure
We have already looked at showing the clipping warning over your photos in Lightroom. Did you know there is actually another shortcut to view the clipping warning as you are adjusting the exposure of your photos? If you press Alt/Option as you are moving the exposure, highlights, shadows, whites or blacks sliders, you can see if what you are doing is blowing out the highlights or blocking the shadows. You can also use this shortcut when adjusting the sharpening and noise reduction to see the effect that it’s having on your photos.
8) Auto Mask Shortcut
If you have ever spent ages painting masks in Lightroom, then this hack will definitely save you time. When you are using the adjustment brush there is a shortcut that will save you a lot of time, this is the auto mask function. Say you are trying to mask an object that has a straight edge, you can press Cmd on Mac or Ctrl on PC to activate the auto mask. Then, as you paint near to an edge, the auto mask will automatically keep your brush stroke to that edge and stop it from spilling over. This is really helpful and can save you a lot of time and effort when you are trying to paint along a straight line.

9) Dim Lightroom Using L
If you wanted to look at the image you’re editing without any distractions around, there is a great shortcut that can use to dim Lightroom. By pressing the L key you can dim Lightroom by 80% so that you can see your photo clearer without any distractions. If you then press L for a second time Lightroom will be completely darkened. Pressing it a third time will take you back to the normal screen. If you press Shift + L you can go back in the reverse direction.

10) Change Background Colour Of Lightroom
Another feature in Lightroom that can be very useful is the ability to change the background colour around your image. It is extremely simple to do this, all you need to do is hover your cursor over the space around your photo, right click, and then select which colour you would like to display. This can be extremely helpful as having your photos against different coloured backgrounds can change the way your photos look, and can change the way you choose to edit your photos. For instance, if you plan to post your photos online the white background will help you as on most sites your photos will display on a white background. There are 6 colours to choose from: white, black and various shades of grey.

11) Preview Split Tone Colours
Split toning can produce some very interesting effects in Lightroom and can be very useful. When you’re using the split tone function you can’t tell exactly what hue you are selecting unless you drag the saturation slider up. Did you know there is actually a shortcut you can use that allows you to preview the hue you are selecting at 100% saturation on your image? Obviously this doesn’t make your image look too good but can be very helpful, and saves you time constantly having to drag the saturation slider up and down. To do this, all you have to do is press Alt/Option while you are dragging the Hue slider.

12) Before and After
Seeing the comparison of the before and after on your images is definitely one of the more basic Lightroom hacks, but is still important. You can see the before and after side by side by using the shortcut Y, or stacked on top of each other by using the shortcut Alt/Option Y. The shortcut I find most useful though switches between the before and after instantly, simply press \ to see a before of your edited image.
13) Change Amount Of Adjustment Filters
And last but by no means least we have one of the LIghtroom hacks that I have only recently discovered. When you are using the adjustment brush or graduated and radial filters to make local adjustments, there is actually a function to control the amount your adjustments affect your photos. This function works very similarly to changing the opacity of layers in Photoshop. When you are using the brush or adjustment filters on the right side panel you will see an arrow at the top that is pointing down. If you click this, the panel will change and you will be able to change the amount the filter affects your photo. This can be especially helpful if you decide you have gone too far with an adjustment and want to change it easily.

Final Thoughts
I hope you enjoyed reading this article and hopefully learnt a few Lightroom hacks that you weren’t aware of before. There are plenty of others that I haven’t touched upon but I have included the ones that I find the most useful. If you wanted to learn a few more check out this video. Lightroom is such a powerful program that is crammed full of helpful features and when you know your way around its various shortcuts and hacks you can really create some amazing results.
If you want to learn more about Lightroom presets you should check out our Lightroom presets guide which will explain everything.
Pin It!

