This article may contain affiliate/compensated links. For full information, please see our disclaimer here.
Do you have an interest in photography? Are you planning to do a bit of travelling? Well if so you’ll probably have a few questions regarding photography gear. If you are new to the world of photography or travelling, then you may not know where to start and this is why I have compiled this ultimate photography equipment list for you. If you need a little assistance when it comes to choosing your photography equipment, then keep reading as I outline absolutely everything you need to know.
What To Expect From This Photography Equipment List
If you’re looking to capture some epic photos it’s best to be as prepared as possible and it is for this reason that this photography equipment list is quite substantial (if you want to skip to a certain piece of equipment you can use the table of contents above). I have tried my best to cover every area possible, which means that not everything in this list will be essential for everyone. However, at one point or another during my travels I have found great value in every single item on this list.
For each piece of equipment I will give a brief explanation of what it is, it’s purpose and whether it is deemed an essential piece of kit. Finally, I will give my personal recommendations so you can make sure you are buying good quality gear.
It is worth noting that although this photography equipment list has been composed with travel photography in mind, it may also be of value to those looking for a photography equipment list that covers any sort of outdoor photography. So if you like landscape, nature, adventure photography or even astrophotography then you may be able to find some value in this list too.
Cameras and Lenses
Camera
Essential Item: Yes
To start off this list we have chosen to go with a pretty essential piece of photography kit, a decent camera. Nowadays there is a ton of choice when it comes to cameras, from compact cameras all the way to top of the range DSLR’s. It can be hard deciding which camera is going to be the best option, but in my experience I have found that mirrorless cameras are the most travel friendly option. I have travelled with both DSLR’s and mirrorless cameras and found the latter to be a lot more convenient because they are smaller and lighter. Although mirrorless cameras usually come in a more compact size they generally have a lot of the same functionality as a DSLR and this is why they make such a perfect travel camera.
My Recommendation
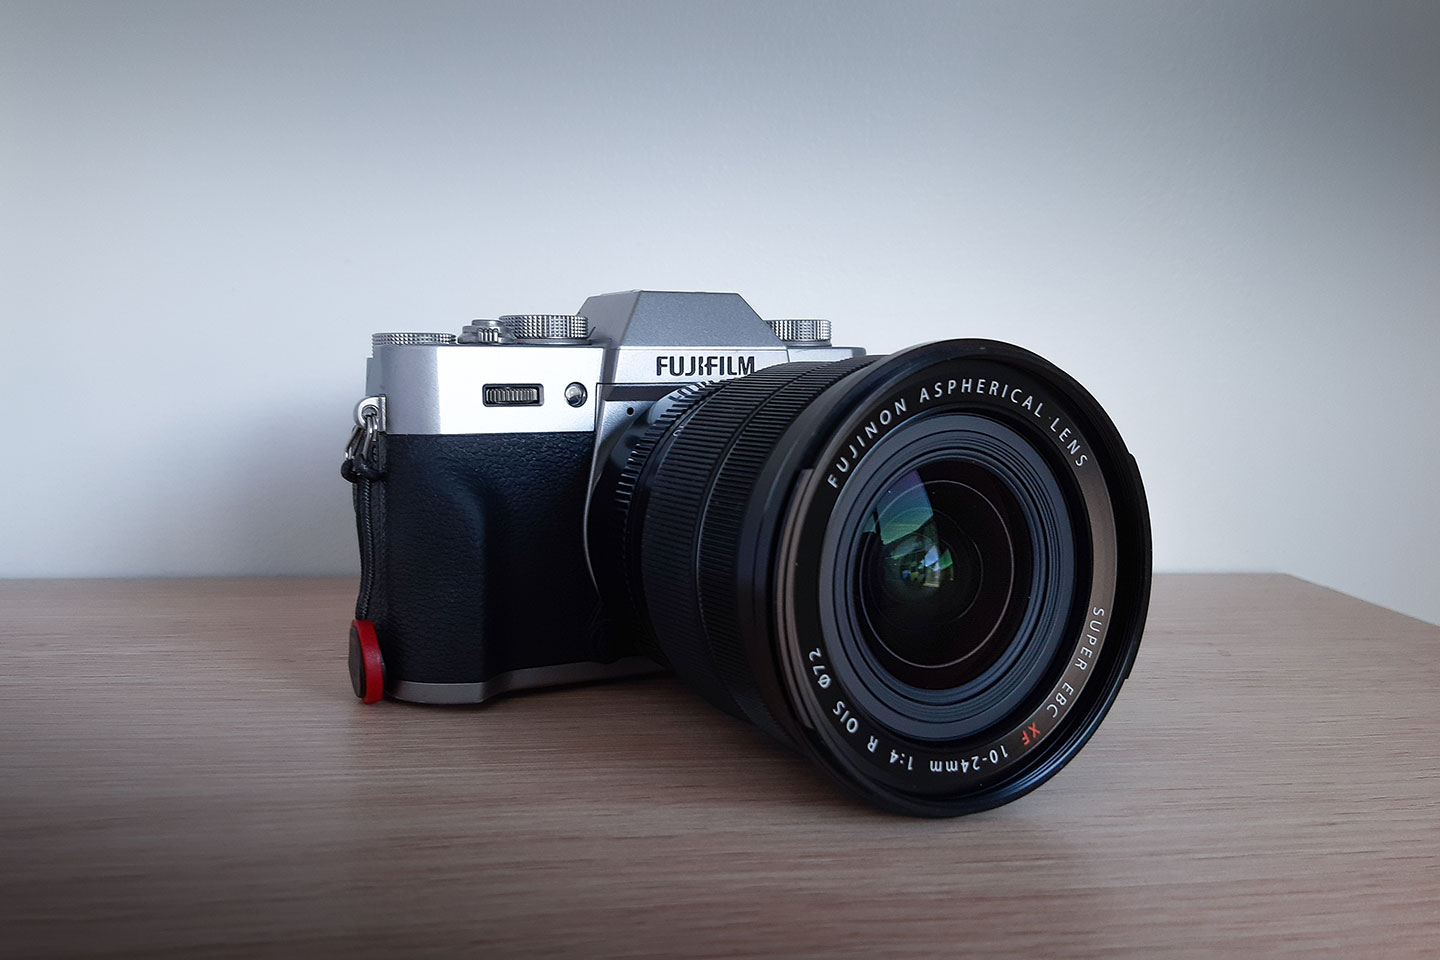
Fujifilm X-T30

When it comes to mirrorless cameras, as much as I love the options that companies like Sony, Nikon and Canon have they are just too darn expensive. Since switching to mirrorless cameras from DSLRs I have found Fujifilm to be a great choice. In particular I love the Fujifilm X-T30 and would definitely recommend it as a fantastic travel camera. It takes great quality photos, is very compact and to top it off, it has a ton of the features of the higher spec Fujifilm X-T3 and at a much more affordable price.
Lenses
Essential Item: Yes
Every good camera needs a good quality lens to go with it if it has any chance of taking some outstanding photos. It’s very easy and a common mistake to focus all the attention on the quality of the camera you’re using. However, if you don’t pair a good camera with quality glass, it doesn’t matter if you’re using the best camera in the world, the results will be pretty lacklustre. When it comes to lenses there are a lot of choices and not all are made equal. If you’re new to the photography game it can be hard choosing what the right option is. Do you get a prime lens, wide angle, a standard zoom, telephoto or a combination of all the above? It obviously depends on the sort of photos you are planning to take but in general, for travel photos I have found a combination of a wide angle lens and standard zoom covers the majority of situations I have found myself in.
| Picture | Lens | Lens Type | Lens Mount | Price | Reviews |
|---|---|---|---|---|---|
 | Fujifilm XF 18-55mm F2.8-4 R LM OIS | Standard Zoom | Fujifilm X Mount | $$ | ★★★★☆ |
 | Fujifilm XF 10-24mm F4.0 OIS | Wide Angle Zoom | Fujifilm X Mount | $$$ | ★★★★★ |
 | Fujifilm XF 18-135mm F3.5-5.6 R LM OIS WR | Standard Zoom | Fujifilm X Mount | $$$ | ★★★★☆ |
Obviously, because I have chosen the Fujifilm X-T30 as my preferred camera of choice to take travelling, the lens I choose has to be compatible with the camera. Normally this means that the lens will be made by Fujifilm or a third party company, such as Sigma or Tamron, that specialises in creating lenses for a number of camera brands.
I have three recommendations when it comes to Fujifilm lenses, if you’re looking for a great standard zoom the Fujifilm XF 18-55mm is a great option. It is a great lens when it comes to optical quality and with a maximum aperture of F2.8 when the lens is at its widest means it can perform great in low light. What’s even better about this lens is that it actually is the kit lens that comes as part of the camera and lens combination, which means it is very affordable.
If you’re looking for a lens that has a little more range than the 18-55mm I would suggest the Fujifilm XF 18-135mm. The optical quality might not quite match the 18-55mm, however it is a much more versatile lens which is great for travelling with. Also unlike the 18-55mm, the 18-135mm is weather sealed which might be an attractive feature to travellers who put their equipment to the test.
Finally, if you are looking for a wide angle lens to capture vast landscapes with, then the Fujifilm XF 10-24mm is your best bet. It is a super sharp lens that is very well built and for a wide angle has minimal distortion, the only downside is that it comes with a rather large price tag in comparison to the other lenses. If you love shooting subjects that benefit from a wide angle lens such as landscapes, I would definitely recommend you get this lens as it is outstanding.
GoPro
Essential Item: If you like underwater activities or want to capture action sports while you travel.
Although this might not make an appearance on everyone’s photography equipment list, if you like spending time in the water this should definitely be on yours. If you’re into scuba diving, free diving, snorkelling, watersports or like action sports while you’re travelling, then a GoPro has to be on your photography equipment list. I think a GoPro is the best camera to capture all your adventures underwater not only because of the quality of the video and photos it can create but its small size means it doesn’t get in the way of what you’re doing.
| Picture | GoPro | Megapixels | RAW Photo Capture | Price | Reviews |
|---|---|---|---|---|---|
 | GoPro HERO7 Silver | 10MP | No | $ | ★★★★★ |
 | GoPro HERO7 Black | 12MP | Yes (Not available with all photo modes) | $$ | ★★★★★ |
 | GoPro HERO8 Black | 12MP | Yes (Available with all photo modes) | $$$ | ★★★★★ |
When it comes to recommending a GoPro it really depends on what your budget is, as all their cameras are amazing. The GoPro HERO7 Silver is the cheapest option by far and produces amazing results but lacks a few features that the other cameras have. For instance, both the HERO7 Black and HERO8 Black give you the ability to shoot in Raw and choose between a number of different digital lenses to frame your shots differently. And the new HERO8 Black allows you to add a number of modifications to the camera such as a light, external microphone and flip up screen.
If you had an endless budget, I would say go for the HERO8 Black as it has some amazing features but if your money doesn’t stretch as far, the HERO7 Silver will allow you to capture some amazing moments. It’s also worth keeping in mind that you may want to purchase some additional accessories for your GoPro. This might range from additional mounts to hand grips and maybe even an extra protective housing to allow you to go to deeper depths with your camera. So keep this in mind when choosing the GoPro you’d like, as this will all cost as well.
Camera Accessories
Camera Bag
Essential Item: Yes
If you’ve got any chance of keeping all the valuable photography equipment on this list safe, you’ll need a good camera bag to protect it. Although there are a lot of different styles of camera bags, in my experience I’ve found backpacks to be the most practical to travel with. It’s worth investing in a quality backpack that is going to last, as the worst thing that could possibly happen is your bag breaking on you while your midway through your travels.
My Recommendation
Peak Design Everyday Backpack

My favourite camera backpack by far is the Everyday Backpack by a company called Peak Design, which is a brand I absolutely love. The bag comes in a choice of four colours and you can choose between a 20 litre or 30 litre capacity bag. Although the Everyday Backpack is primarily a camera bag, it can easily be configured to carry any and all items you may want to transport during your travels. Despite the Everyday Backpack being a great camera bag, the thing I love the most is that from the outside it looks nothing like a camera backpack. This is great, not only because it looks extremely stylish, but it also means that it’s hard for any nearby thieves to know you’ve got a bag full of expensive equipment.
Filters
Essential Item: If you want to massively improve your photos.
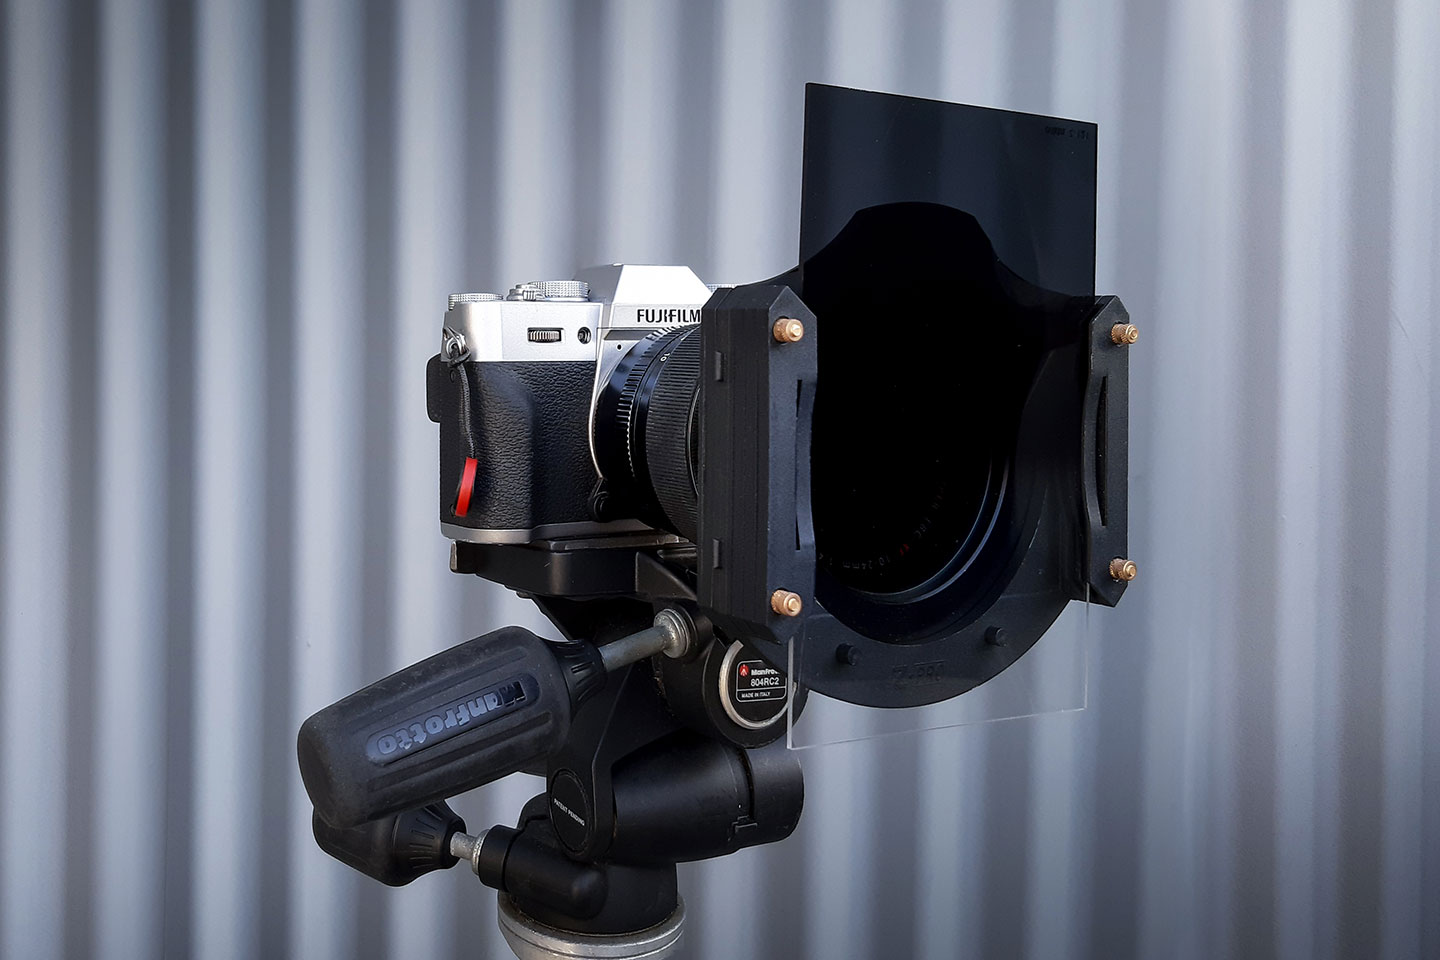
If you are looking to take some epic photos, then you’ve got to add a decent collection of filters to your photography equipment list. Filters will allow you to achieve photos that otherwise would be impossible to take with just your camera. The main filters you need to worry about are neutral density, graduated neutral density and my favourite, the circular polarizing filter.
All these filters allow you to achieve different results, for instance neutral density filters will darken the image so that you can slow the shutter speed down. This can be very helpful if you are photographing moving water and want to create a dreamy effect. A graduated neutral density filter is similar except only half the filter is darkened and the other half clear. This is handy when you are shooting sunset or sunrises when the sky is a lot lighter than the rest of the image and needs to be darkened. If you’re interested in learning some more about neutral density filters then check out this great article.
And finally the circular polarizing filter which has a number of uses, it’s probably the filter that I use the most. With a polarizer you can make certain colours appear a lot more vibrant, for instance you can change the vibrancy of a blue sky and completely transform an image. Polarizing filters are also great at increasing the clarity in photos that contain reflections or glare. A great example of this is when you try to take photos of water, for instance a lake. Without a polarizing filter you will generally see the clouds or sky reflected in the surface of the water. However, if you use a polarizing filter you will be able to cut out these reflections so you can see through to the bottom of the lake. If you’d like to learn more about polarizing filters and how to use them check out this great article.
| Picture | Filter | Type | Price | Reviews |
|---|---|---|---|---|
 | Hoya Pro-1 Digital Circular Polarizing Filter | Polarizing Filter | $ | ★★★★☆ |
 | Cokin Nuances Extreme ND Smart Filter Kit | ND & Grad ND Filter Kit | $$$ | ★★★★☆ |
If your budget doesn’t stretch too far and you can only invest in one filter I would definitely recommend getting a polarising filter, my favourite is the Hoya Pro 1 circular polarizer. The Hoya Pro 1 is made from high quality materials which means that it performs very well. It is very affordable and is something you can consider an investment, as it will last you a long time if you look after it properly.
When it comes to neutral density filters it starts to get a little more expensive. This is because you will have to buy more than one filter and also, in most cases, a filter holder to attach the filters to the front of your lens. Although there are lots of cheap alternatives when it comes to neutral density filters, I would recommend you get a good set as they will last you a long time and produce far superior results. I have found the Cokin Nuances Extreme line of both neutral density and graduated neutral density to perform very well. They are made of high resolution shock resistant glass that creates exceptional optical quality. The Nuances Extreme are extremely colour neutral which means that they do not leave a colour cast even if they are stacked in front of each other. Check out more about them here.
Tripod
Essential Item: If you like shooting sunsets, sunrises, astrophotography or anything that requires a long exposure.
Although you definitely don’t need a tripod all the time when you’re travelling, it can definitely come in super handy. If you’re anything like me and love to shoot landscapes while you’re travelling, then a good sturdy tripod is an essential piece to add to your photography equipment list. There are lots of reasons why you might use a tripod, when it comes to travel photography the main aim of a tripod is to keep your camera motionless. If you are going to take photos of sunsets, sunrises or the starry night sky, you will need to take a long exposure. In order to take a photo that is in focus, and most importantly looks great, you need to make sure your camera stays perfectly still and to do this you need a tripod.
My Recommendation
Manfrotto Befree Travel Tripod

Manfrotto have been producing quality tripods for years so they are a company you can really trust. They have many different types of tripods but my personal favourite is their line of travel tripods, which is called BeFree. The BeFree tripods, although very sturdy, are great to travel with as they can pack down to such a small size which means they are very easy to transport. They come in a number of different colours and you can choose between a tripod made from aluminium or carbon fibre. The BeFree travel tripods are an affordable option whilst also guaranteeing you get a quality product.
Camera Strap
Essential Item: Not essential, but definitely extremely useful.
When it comes to camera straps I always like to upgrade the straps that are supplied with the camera you buy. Most cameras are equipped with straps already so this isn’t necessarily an essential item for your photography equipment list, however it is certainly a very useful one. I find the stock straps supplied with cameras to be very basic and usually offer no ergonomic qualities for the user. Fortunately, there are a few companies that are creating camera straps that dramatically improve your experience with your camera.
My Recommendations
Peak Design Slide

Peak Design Slide Lite

I’ve tried a few third party camera straps and the one I have found the best is made by my absolute favourite company, Peak Design. They make two straps that are very similar, the Slide and Slide Lite, the only difference between them being their size. The Slide is larger and is for use with bulkier DSLRs and the Slide Lite is smaller, it works perfectly with light DSLRs and mirrorless cameras.
With both straps you can easily and quickly change the strap to wear as a sling, neck or shoulder strap. You can achieve this as the strap is connected to the camera using Peak Design’s unique anchor link system which allows you the freedom to choose how you carry your camera. The straps have dual quick-adjusters which allow you to easily reconfigure the length of your strap, which I have found to be very practical while taking photos. If you are planning on carrying your camera with you a lot while you travel I would definitely recommend buying this strap, it will make carrying your camera a lot easier and way more comfortable.
Mobile Photography Apps
Essential Item: No, but can prove to be very helpful.
Although definitely not an essential item for most people, there are a few photography apps you can get for your phone or tablet that can help you to get the best photos possible. There are a lot of apps that can help you to take better photos with your phone but that’s not what I want to focus on here. I’m talking about apps that can effectively improve your photos with your DSLR or mirrorless camera.
My Recommendation: PhotoPills
PhotoPills is an application that essentially allows you to plan your photos ahead of time. So, if you like to take photos of landscapes, sunrises, sunsets, the night sky or time lapses while you travel, then PhotoPills could help you. The app has many features including time lapse planner, exposure calculator and all the information you need to know about the sun’s movements during the day. This includes blue hour times, golden hour times, sunrise times and sunset times for your location, which can be extremely helpful information. The app has a vast amount of information and features that really can be very helpful for when you’re planning and taking photos. You can find PhotoPills on the App Store and Google Play Store.

Miscellaneous Camera Accessories
Essential Items: No
There are lots of small accessories that you can add to your photography equipment list that can help to make your life easier while you travel. It’s always very helpful to bring a few extra camera batteries, memory cards, a camera cleaning kit and also a remote shutter release can come in very handy while travelling.
My Recommendation
Zeiss Lens Cleaning Kit

All these items are very low cost so you don’t have to break the bank to buy them. Spare camera batteries are super useful, especially if you’re using a mirrorless camera as these will lose charge a lot quicker than DSLRs. The most useful item on this list though is the Zeiss cleaning kit, this one has saved me more times than I care to remember. Keeping your camera and lenses clean is very important, not only will it improve the quality of your photos but it will actually help you to keep your equipment running for longer.
Miscellaneous Useful Items
Essential Items: Not essential, however extremely helpful.
The following items are not necessarily photography items but are items that I think should be part of every photography equipment list. First of all a power bank is something that every traveller should take with them. You never know when you might run out of charge and need a top up on your phone, tablet or camera.
An external hard drive can come in handy for backing up your all important photos and storing anything that you might not be able to store on your laptop or tablet. A decent flash light is something that I always carry around with me while I travel. If you ever try to shoot during the night, a good flash light is an indispensable piece of kit.
Whether you’re into photography or not, while you travel a good multi-tool will always come in handy in a time of need. There’s always times when travelling where you may need a screwdriver to tighten a screw, some scissors to open a package or even some pliers to fix something. Finally, a dry bag can be a very useful item for anyone who likes to spend a lot of time near or in the water while they travel. This is something that I wish I had had with me on a trip to the Philippines where my Canon 5D Mark II fell off a boat into the sea. If I’d had a dry bag with me my camera might still be in working order.
| Picture | Item | Price | Reviews |
|---|---|---|---|
 | Anker PowerCore 20100 Power Bank | $$ | ★★★★☆ |
 | LaCie Rugged Portable Hard Drive | $$$ | ★★★★☆ |
 | ThruNite Archer 2A V3 Flash Light | $ | ★★★★☆ |
 | Leatherman Style PS Multi-Tool | $ | ★★★★☆ |
 | Earth Pak Waterproof Dry Bag | $ | ★★★★☆ |
Photo Editing
Laptop/Tablet
Essential Items: Yes
If you are going to want to edit any of your photos while you are travelling, then a laptop or tablet is a pretty essential item. You can obviously edit photos using your phone nowadays with the use of the Lightroom mobile app, but editing on such a small screen is less than ideal. I prefer to take a tablet to edit with while I travel, this is purely because I feel a lot safer carrying my inexpensive iPad around with me than a much pricier MacBook Pro. A tablet still allows me to edit amazing photos but I don’t have to worry as much if it gets broken or stolen. Obviously if you feel more comfortable editing on your laptop, feel free to add it to your photography equipment list but keep in mind you can still make your photos stunning with a mobile device.
My Recommendations
Apple MacBook Pro 13″

Apple iPad

Lightroom/Photoshop
Essential Items: Yes
So, you’ve got your laptop or tablet, now all you need is some software to edit your photos with. When it comes to image editing software, although there are lots of options on the market, I prefer to stick to what I know works, in this case it is Adobe Lightroom and Adobe Photoshop. Lightroom and Photoshop are both very powerful and can help you achieve beautiful photos. Lightroom is generally used to organise, edit and store your photos and Photoshop is generally used for more advanced editing techniques such as compositing and advanced image manipulation.
Although both programs are fantastic, normally you’ll find Lightroom is the best option to quickly and efficiently edit your photos. If you are new to image editing and manipulation I would advise you to try Lightroom first and once you are familiar with it then try Photoshop as it is far more advanced. You can get both programs on your computer for a very reasonable monthly fee via the Creative Cloud or for free as an app on your tablet or mobile device.
My Recommendations: Adobe Lightroom

Photography Learning
If you want to take amazing travel photos, making sure you have all the right equipment is very important, however you don’t want to be in the position where you have all the gear but no idea. Having a little knowledge about photography and the equipment you are using is almost more important than all the kit you buy. Luckily we live in a time where any information you want to find out is only an internet search away so this isn’t the hardest thing to achieve.
If you’re just looking to learn a little about photography or how to use your camera, then you can do that fairly easily with YouTube. However, if you’re looking to delve a little deeper into how to take great photos there are plenty of online resources where you can do this. If you’re looking to improve your photography skills or knowledge you should check out Udemy, Skillshare or CreativeLive. They all provide a number of courses that cover the whole spectrum of photography including travel, landscape and astrophotography.
If you are interested in improving your post production skills, my personal favourite learning resource is Phlearn. Phlearn is amazing as their Photoshop and Lightroom tutorials are incredibly rich with information. The way their tutorials are taught is extremely engaging which makes the whole learning experience incredibly fun. You can join the Phlearn program for a very affordable fee that allows you access to over 150 in-depth tutorials.
My Recommendations: Phlearn
Final Thoughts
We covered a lot of information there, so if you made it this far then well done, you now have all the information you need to create your own ultimate photography equipment list. Although not everyone will need to take everything on this list with them when they travel, it gives you an idea of what you may want to pack to get picture perfect travel images. I personally take everything on this list with me when I travel so that I can make sure I am ready for each and every photo opportunity that crops up. Whether it’s an amazing sunset, perfect waterfall or star filled sky, I’m always able to capture incredible photos and now, with this list, hopefully you will too.
Disclaimer: The Photographers Passport is a participant in the Amazon Services LLC Associates Program, an affiliate advertising program designed to provide a means for us to earn fees by linking to Amazon and affiliated sites at no additional cost to you. Please note we only link to products & services we personally use or trust.
Pin It!