This article may contain affiliate/compensated links. For full information, please see our disclaimer here.
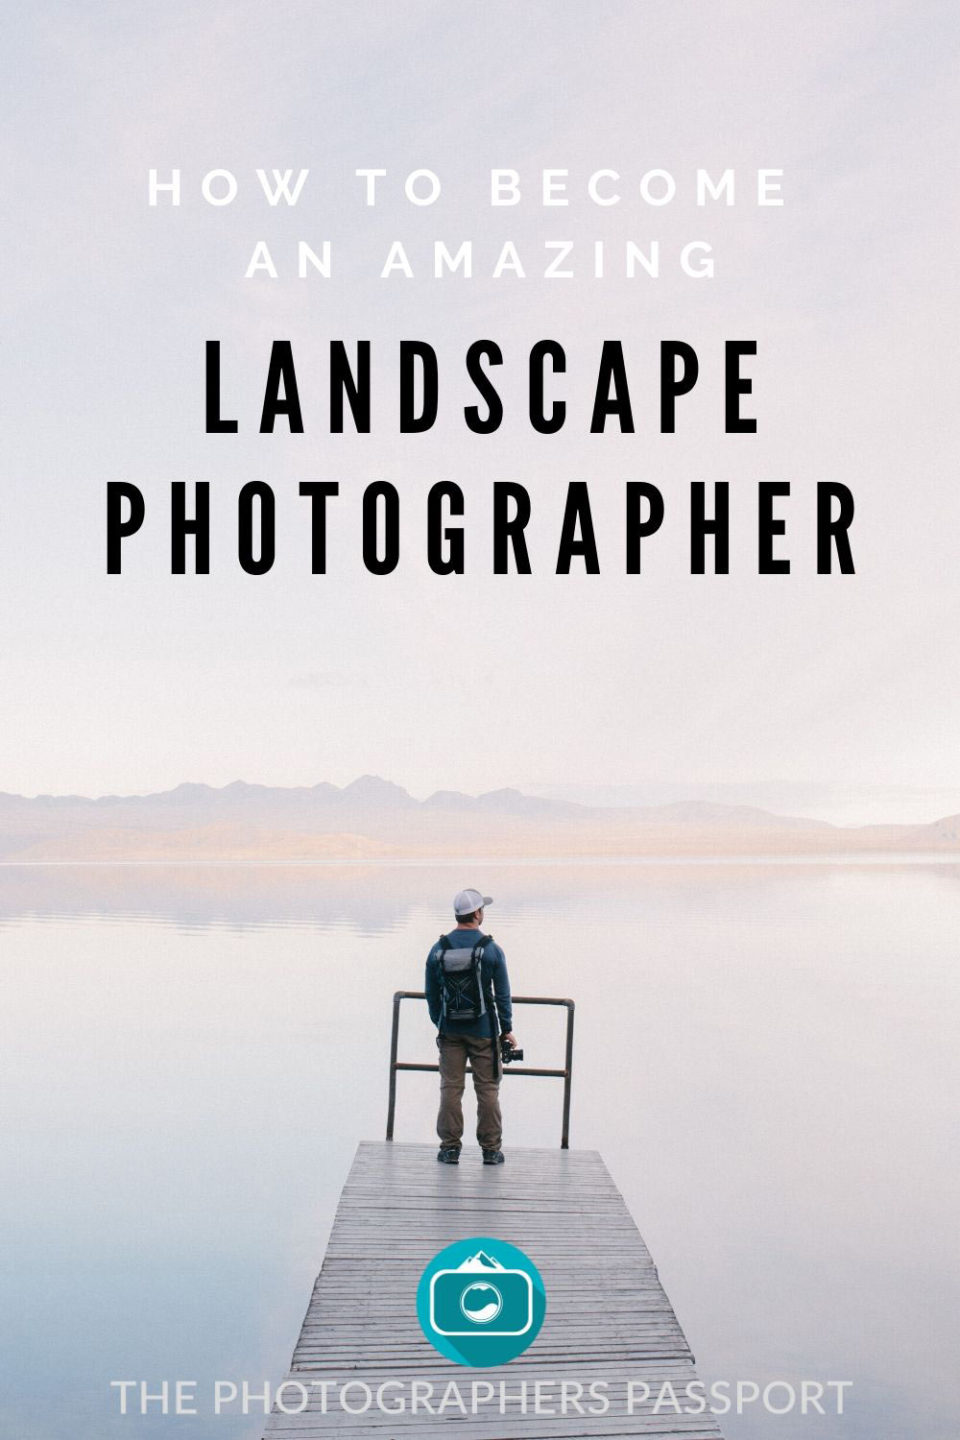
Would you like to become an awe-inspiring landscape photographer? Well congratulations, you have landed in the right place. In this ultimate how to guide you are going to learn everything you need to know to start your journey to becoming a master of landscape photography. We will be covering everything from the equipment you need, recommended camera settings, how to compose your shots, how to edit your landscape photos and even a few tips on how to become a better landscape photographer. Enjoy!
- What Is Landscape Photography?
- What Equipment Do Landscape Photographers Use?
- What Settings Should a Landscape Photographer Use?
- How Do Landscape Photographers Find the Best Light?
- How Do You Compose a Landscape Photo Like a Pro?
- How Does a Landscape Photographer Edit Photos?
- Who is the Best Landscape Photographer?
- How to Become a Better Landscape Photographer?
What Is Landscape Photography?
There are many styles and types of photography which is why it can be such an interesting medium to be involved with. Each style of photography will require a different set of skills and this skill set can be vastly different from one style to another. Landscape photography tends to be one of the more popular styles of photography and I think this is likely due to how accessible it is to the everyday individual. As long as you have a camera and a beautiful scene or landscape you can start shooting landscape photography.
Landscape photography is usually characterized as photography that captures an exciting outdoor natural scene. It could be photography of a mountain range, lake, river or in fact any type of landscape you’d like to take a photo of. This is why it is so accessible, you don’t need to find a model, have a studio or even have any expensive equipment. If you wanted to, you could start taking landscape photography with as little as your phone and a desire to be outside. This is what I found when I discovered an interest in landscape photography when I was a teenager. Now nearly 15 years on I have been involved with many styles of photography and learnt a lot but my love for landscape photography still remains.
What Equipment Do Landscape Photographers Use?
As I have already said you don’t necessarily need a ton of expensive camera equipment to start taking landscape photography. However, to have any chance of being a half decent landscape photographer there are a few pieces of equipment that will make the job a little easier.
What Camera Do Landscape Photographers Use?
Generally, a landscape photographer will use either a DSLR or mirrorless camera and in the case of some professional photographers even a medium format camera. Although you can take landscape photos with any camera, if you are serious about landscape photography you should be aiming to use either a DSLR or mirrorless camera. If you’re not totally sure what a DSLR or mirrorless camera is, you can check out this great article that explains everything.
There are a few reasons why you should use either a DSLR or mirrorless camera for your landscape photography. The first reason is because these will allow you complete control of all the settings of your camera. This will allow you to achieve far superior results than if you were using a camera that didn’t allow you as much control. As well as allowing you control of the settings, a DSLR or mirrorless camera will allow you full control over your choice of lens. This is because these cameras use interchangeable lenses, which mean you can select a specific type of lens and this can have a big effect on the overall look of the photo.
The final reason you should choose either a DSLR or mirrorless camera is because they have a larger sensor than other types of consumer cameras. These cameras will either have a full frame sensor, APS-C or micro four thirds, with full frame being the largest and most expensive of the three and micro four thirds the smallest and cheapest. There are a few reasons for needing a larger sensor for landscape photography and these include expanded depth-of-field and a larger angle of view, but the main reason is that a larger sensor offers superior image quality.
Although I would urge you to invest in a DSLR or mirrorless camera, only buy what you can afford. If you have the money to buy a top of the range DSLR with a full frame sensor that’s great but if you can only afford a camera with a micro four thirds sensor that’s great too, you will still be able to create breathtaking landscape photos with this. Although obviously better equipment will allow you to create better results, when it comes down to it what you know is actually far more important than what you have. For instance, say you gave a professional landscape photographer an entry level camera and a complete novice the best camera money can buy, I can guarantee you the professional photographer will take the better photo because he has important valuable knowledge.
Here are a few cameras to consider. I’ve included entry level cameras, a few mid range cameras and then some of the best flagship cameras as well.
| Picture | Camera | Sensor | Type | Price | Reviews |
|---|---|---|---|---|---|
 | Fujifilm X-T30 | APS-C | Mirrorless | $$$ | ★★★★☆ |
 | Sony Alpha a6000 | APS-C | Mirrorless | $ | ★★★★☆ |
 | Canon EOS Rebel T7i/800D | APS-C | DSLR | $$ | ★★★★☆ |
 | Sony Alpha a6600 | APS-C | Mirrorless | $$$$ | ★★★★☆ |
 | Sony A7R III | Full Frame | Mirrorless | $$$$$ | ★★★★★ |
 | Nikon D850 | Full Frame | DSLR | $$$$$ | ★★★★★ |
What Lenses Do Landscape Photographers Use?
When it comes to choosing equipment for landscape photography, it can be all too easy to get caught up in finding the best camera to buy. Don’t get me wrong, cameras are important, but almost every landscape photographer will tell you that lens choice is way more important. Lens choice is so important because it will influence the quality and outcome of your images much more than your camera will. The sharpness, depth of field, clarity, detail and field of view will all be determined by the quality and type of lens you choose to use.
There are two main types of lenses, prime and zoom. A prime lens has a fixed focal length such as 50mm, whereas a zoom lens has a focal length that can be varied, for instance 16-35mm. Each have their pros and cons, prime lenses amongst other things are generally thought to deliver sharper images because there are fewer elements inside the lens. Zoom lenses however, are more versatile as you can shoot at many focal lengths which means you can carry fewer lenses with you.
A lot of the time it is a personal preference whether you shoot with a prime or zoom lens, I personally like to primarily use zoom lenses. If you’re new to landscape photography I would suggest you stick to zoom lenses as it will give you a lot of flexibility when it comes to shooting. When it comes to zoom lenses there are three main types, wide-angle lenses, standard zoom and telephoto lenses.
Most of the time landscape photographers will use a wide-angle lens generally in the range of 16-35mm. Wide angle lenses are great for capturing more of the landscape which is why they are very popular with landscape photographers. Standard zoom lenses are the most versatile of the three lenses. If you are a complete beginner this is the lens you should get first, standard zooms will generally be in the range of 24-70mm. Finally, a telephoto lens is what you need if you want to focus on an object far away. Telephoto lenses will generally have a focal length somewhere in the range of 70-300mm.
One thing to keep in mind when buying a lens is the sensor size of your camera. If you have a camera with an APS-C or micro four thirds you will find these cameras have a crop factor, which will affect the lens focal length in your images. Essentially, because the sensor is smaller than a full frame camera, it is not able to capture as much of the image but all this really means is that you will need to buy a wider lens. For instance, if you wanted a wide angle lens for your APS-C camera, you would get a lens with a focal length of 10-24mm instead of 16-35mm, to compensate. Luckily lots of camera manufacturers create many lenses especially for smaller sensor cameras to compensate for the crop factor. If you wanted a more detailed explanation of the crop factor, check out this great article.
Here are a few lenses to consider, I’ve included a variety of different zoom lenses that will be compatible with some of the cameras I’ve already talked about. Just note that when choosing a lens for your camera you may have to do a lot of your own research to find the best lenses that are compatible with your camera and sensor type.
| Picture | Lens | Lens Type | Lens Mount | Lens Format | Price | Reviews |
|---|---|---|---|---|---|---|
 | Fujifilm XF 10-24mm f/4.0 OIS | Wide Angle Zoom | Fujifilm X Mount | APS-C | $$$ | ★★★★★ |
 | Fujifilm XF 18-55mm f/2.8-4 R LM OIS | Standard Zoom | Fujifilm X Mount | APS-C | $$ | ★★★★☆ |
 | Fujifilm XF 55-200mm f/3.5-4.8 R LM OIS | Telephoto Zoom | Fujifilm X Mount | APS-C | $$ | ★★★★☆ |
 | Sony E 10-18mm f/4 OSS | Wide Angle Zoom | Sony E Mount | APS-C | $$$ | ★★★★☆ |
 | Sony E 16-55mm f/2.8 G | Standard Zoom | Sony E Mount | APS-C | $$$$ | ★★★★★ |
 | Sony E 70-350mm f/4.5-6.3 G OSS | Telephoto Zoom | Sony E Mount | APS-C | $$$ | ★★★★☆ |
 | Tamron 10-24mm f/3.5-4.5 Di II VC HLD | Wide Angle Zoom | Canon EF Mount | APS-C | $ | ★★★★☆ |
 | Canon EF 24-70mm f/4L IS USM | Standard Zoom | Canon EF Mount | Full Frame | $$$ | ★★★★☆ |
 | Canon EF 70-200mm f/4L IS II USM | Telephoto Zoom | Canon EF Mount | Full Frame | $$$$ | ★★★★★ |
Does a Landscape Photographer Need a Tripod?
A good sturdy tripod is an essential piece in every landscape photographer’s toolkit. You will definitely need to invest in a good tripod if you want to start taking amazing landscape photography. You’ll quickly learn that with landscape photography the shutter speeds you’ll be using will make it near impossible to capture steady photos handheld. This is because a lot of the settings you will be using, and the time of day you’ll be shooting at, will mean you’ll need to use slow shutter speeds to capture correct exposures.
When it comes to buying a tripod, a lot of newbies make the same mistake; they buy a cheap flimsy tripod that does a terrible job of keeping their camera still. I made this same mistake when I bought my first tripod, it was awful and it didn’t take long till I went out and got another one that did the job properly. Although you may be a little skeptical of spending a few hundred dollars on a tripod, believe me it’s worth it. If you’re serious about becoming a landscape photographer, a good tripod is just about the best investment you can make because it will likely last you till you decide to retire.
Below, you can find some great tripods that are perfect for the job. I personally love Manfrotto tripods, but there are plenty of great tripods currently on the market. When buying a tripod make sure you check the load capacity so you can make sure it will be able to handle your camera with its heaviest lens on top.
| Picture | Tripod | Load Capacity | Price | Reviews |
|---|---|---|---|---|
 | Manfrotto Befree Advanced Travel Tripod | 17.64 lbs (8kg) | $$ | ★★★★☆ |
 | Benro Travel Angel FTA28AB1 | 22 lbs (10 kg) | $$$ | ★★★★★ |
 | Manfrotto MT190 XPRO4 (Purchase tripod head separately) | 15.4 lbs (7kg) | $$ | ★★★★☆ |
Does a Landscape Photographer Use Filters?
Filters can be an incredibly simple way to improve the quality of your landscape photography and really take it to the next level. There are three main filters you’ll want to get acquainted with, these are the circular polarizing filter, neutral density and graduated neutral density filters.
A circular polarizing filter will help you to remove reflections from highly reflective surfaces such as water. A good example of this in practice is if you are photographing a lake and the surface reflects the sky and clouds. If you use a circular polarizer you will be able to remove these reflections so you can see through to what is happening under the surface. Polarizing filters are also very good at enhancing certain colors such as the blues you find in the sky.
If you’ve ever wondered how landscape photographers create those dreamy blurred water shots, wonder no more. They would have likely used a neutral density filter, or ND filter for short. Essentially, an ND filter is a piece of grey tinted glass that you place in front of your lens to limit the amount of light that enters the cameras lens. This basically allows you to use a slower shutter speed so that you can effectively blur any moving water in your shot. ND filters come in varying strengths so you can choose how much light you want to cut out.
Graduated neutral density filters are very similar to neutral density filters except they only limit the light in certain parts of the image. This is made possible because the filter is made up of half grey tinted glass and half clear glass. These filters are extremely helpful when used at sunset or sunrise where the sky is substantially lighter than the foreground landscape. Graduated ND filters are primarily used by landscape photographers to even out the exposure difference between the sky and foreground, they are extremely useful.
Here are some filters to consider. If you’re just beginning landscape photography start with the polarizing filter.
| Picture | Filter | Type | Price | Reviews |
|---|---|---|---|---|
 | Hoya Pro-1 Digital Circular Polarizing Filter | Polarizing Filter | $ | ★★★★☆ |
 | Cokin Nuances Extreme ND Smart Filter Kit | ND & Grad ND Filter Kit | $$$ | ★★★★☆ |
What Settings Should a Landscape Photographer Use?
Now we have covered some of the basic equipment landscape photographers use we can start with the really important part, the settings. It is so important to know your way around your camera’s various settings, what settings to use and when to use them. Landscape photography is an outdoors discipline which means we have no control over aspects such as the weather and natural light. These can change in an instant and in order to capture great landscape photos you will need to know how to adjust your settings accordingly. Don’t worry I will be covering everything you need to know, but keep in mind that the best way to learn is through experience. If you want to become a great landscape photographer, you will have to go out and put all this information into practise.
RAW Vs JPEG: Which Should You Use?
When taking photos with your camera you will normally have the option to choose the file format the image is recorded as. The two main types you will find on a DSLR or mirrorless camera are JPEG and RAW file formats. Normally the default for most cameras is set to JPEG, but for the purposes of most types of photography including landscape photography, you will want to change this to RAW.
JPEG is a compressed file format and this means that some of the data the camera captures is discarded in order to create a smaller size file. As you can probably guess RAW is the opposite to this as it is a completely uncompressed file format. Essentially this means that when you come to edit your RAW file in a program such as Lightroom, you have all the information intact. This allows you far more possibilities, makes the job of editing way easier and most importantly means your photos will be better.
So remember to change the file format you are shooting in, to RAW. With a quick google search or a look through the supplied manual, it’s relatively easy to find out how to do this on your particular camera model.
Which Shooting Mode to Use?
Your camera will likely have a few shooting modes to choose from. The usual choices are auto, aperture priority, shutter priority or manual. For landscapes, it’s best to use either aperture priority or manual. For beginners, you should stick to aperture priority and as you gain confidence and knowledge you can learn to use your camera in complete manual mode and see which you prefer.
On most cameras aperture priority can easily be selected using a dial on the top of the camera, aperture priority is usually “Av” or “A” and manual “M” however this is not always the case. For instance, I have a Fujifilm and to set it to shoot in aperture priority I have to switch the camera to manual, then a button on my lens to manual aperture and the shutter dial on the top of my camera to Auto. Again with a quick google search or looking at your camera’s manual you can learn how to do this with your particular camera.
The reason for using aperture priority mode is because it gives you complete control of the aperture, which is very important in landscape photography. This will allow you to control the depth of field in your photos and essentially make creative decisions that will determine the outcome of your landscape photos. If you’re wondering what exactly aperture and depth of field is don’t worry, in a later section I will explain this in more detail.
Which Focus Mode to Choose?
When it comes to focusing on your subject you have a few options as most cameras will have a few different settings. If you’re using a DSLR or mirrorless camera you will likely be able to choose between single shot autofocus, continuous autofocus and manual focus. For the purposes of landscape photography, single shot autofocus or manual focus is ideal. If you have a great eye and are confident using manual focus, then definitely go ahead and use it. If you are not quite confident enough to use manual focus, single shot autofocus will get you the results you want.
What Metering Mode to Use?
When it comes to choosing the metering mode of your camera I believe it is better to keep it simple. The metering mode is essentially how your camera decides the correct exposure for your photo. Each camera manufacturer will call their metering modes different names but the main ones you are likely to find are evaluative or average, center weighted and spot metering.
For landscape photography it is best to keep the metering mode to evaluative or average metering. This mode will allow your camera to choose the correct exposure based upon the entire frame. This is best for landscape photographers to use as most of the time you will want an even exposure across the entire frame. If you wanted to learn a little more about metering modes, then this article explains all.
How Do Landscape Photographers Nail the Perfect Exposure?
Nailing the correct exposure is so important in all types of photography, but knowing how to achieve this in landscape photography is especially important. As we have already touched upon, the weather and light can change very quickly when out in the field and this can have a major effect on the overall exposure of your photo. This is why it’s so important to know your way around your camera settings especially, aperture, shutter speed and ISO. These three settings work together and determine the exposure of your images. If you’re not totally sure what these are or how they affect the exposure don’t worry, I will be going into this in detail.
Aperture
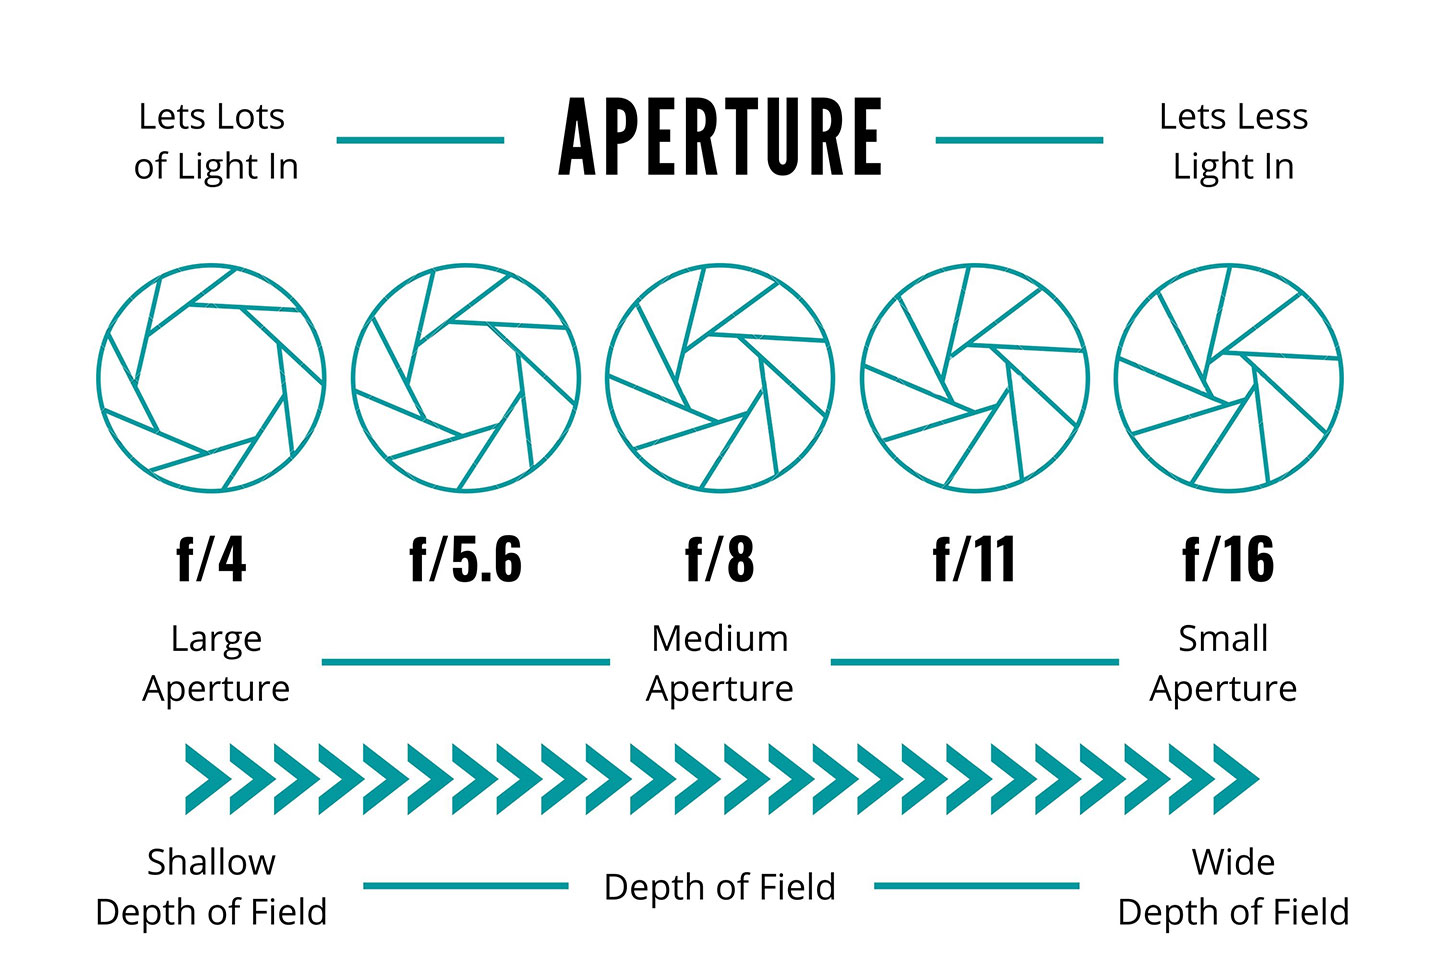
The aperture refers to the size of the circular hole in the lens that lets light into the camera. With the aperture we can control how much light enters through the lens, to do this on your camera you will have to change the f-stop. The f-stop is a number that essentially indicates the size of the opening of the aperture. For instance, f/1.2 would mean that the aperture is wide open and lets lots of light in, whereas f/22 would mean that the aperture is very small and very little light would be let in.
This obviously has a big effect on the final exposure of your image but landscape photographers will actually select a certain aperture to control the depth of field in their images. Depth of field, in basic terms, is the amount of the image that is in sharp focus. The smaller the aperture, the wider the depth of field, which means more of the photo will be in focus. Landscape photographers generally prefer to have the majority of their photos in focus so will use a smaller aperture. You’ll generally find landscape photographers using f-stops between f/11 and f/22.
Shutter Speed
Now onto the next piece of the exposure puzzle, shutter speed. Shutter speed determines the length of time the camera’s sensor is exposed to light. Inside the camera you have the sensor and in front of the sensor you have the shutter curtain which opens and closes when you take a photo. It is the opening and closing of the shutter curtain that determines how much light exposes the image, the longer it stays open the more light is let in.
Shutter speed is generally either displayed in seconds or a fraction of a second. For instance, an example of a very fast shutter speed would be 1/8000 of a second. An example of a very slow shutter speed would be 30 seconds, this means the shutter is open for 30 seconds and exposing the photo for this amount of time.
You will find that in landscape photography you will generally have to use slower shutter speeds. This is because of the smaller aperture you’ll be using and also because of the ISO too which we will talk about next. This is why it is so important to use a tripod in landscape photography as you will need your camera to be as still and steady as possible. If you are using aperture priority as we talked about earlier, you won’t have to worry too much about your shutter speed as the camera will select the correct shutter speed based on the aperture you choose. Just make sure you check the shutter speed it selects, so you can position the camera appropriately.
ISO
The last piece of the puzzle to nailing the perfect exposure is the ISO. The term comes from traditional film photography when ISO was an indication of how sensitive to light the film was. Now it is used in digital photography and is essentially the rating of how sensitive to light your camera’s sensor is. This is recorded as numbers, the higher the number the more sensitive your camera will be to light.
If you are somewhere that is very bright a lower ISO should be used, something like 100. Whereas if you are shooting in a very low light situation such as in astrophotography you would want to use a high ISO, something like 3200. Something that is very important to keep in mind with ISO is that the higher the ISO the grainier your image will be. This is why if you are looking to shoot a crisp image you should try to keep your ISO as low as possible. In landscape photography especially, you should try to keep your ISO low and again this will likely mean your shutter speed will be very slow so using a tripod is key.
These three settings, when used together correctly, will allow you to create perfectly exposed images. All recommendations for settings are guidelines and there may be situations that you encounter in the field where these settings may not be ideal. This is one of the reasons why it is so important to know your camera and its settings like the back of your hand. With a little practise you will become familiar with the settings that work best for different types of situations and become a very competent landscape photographer.
How Do Landscape Photographers Find the Best Light?
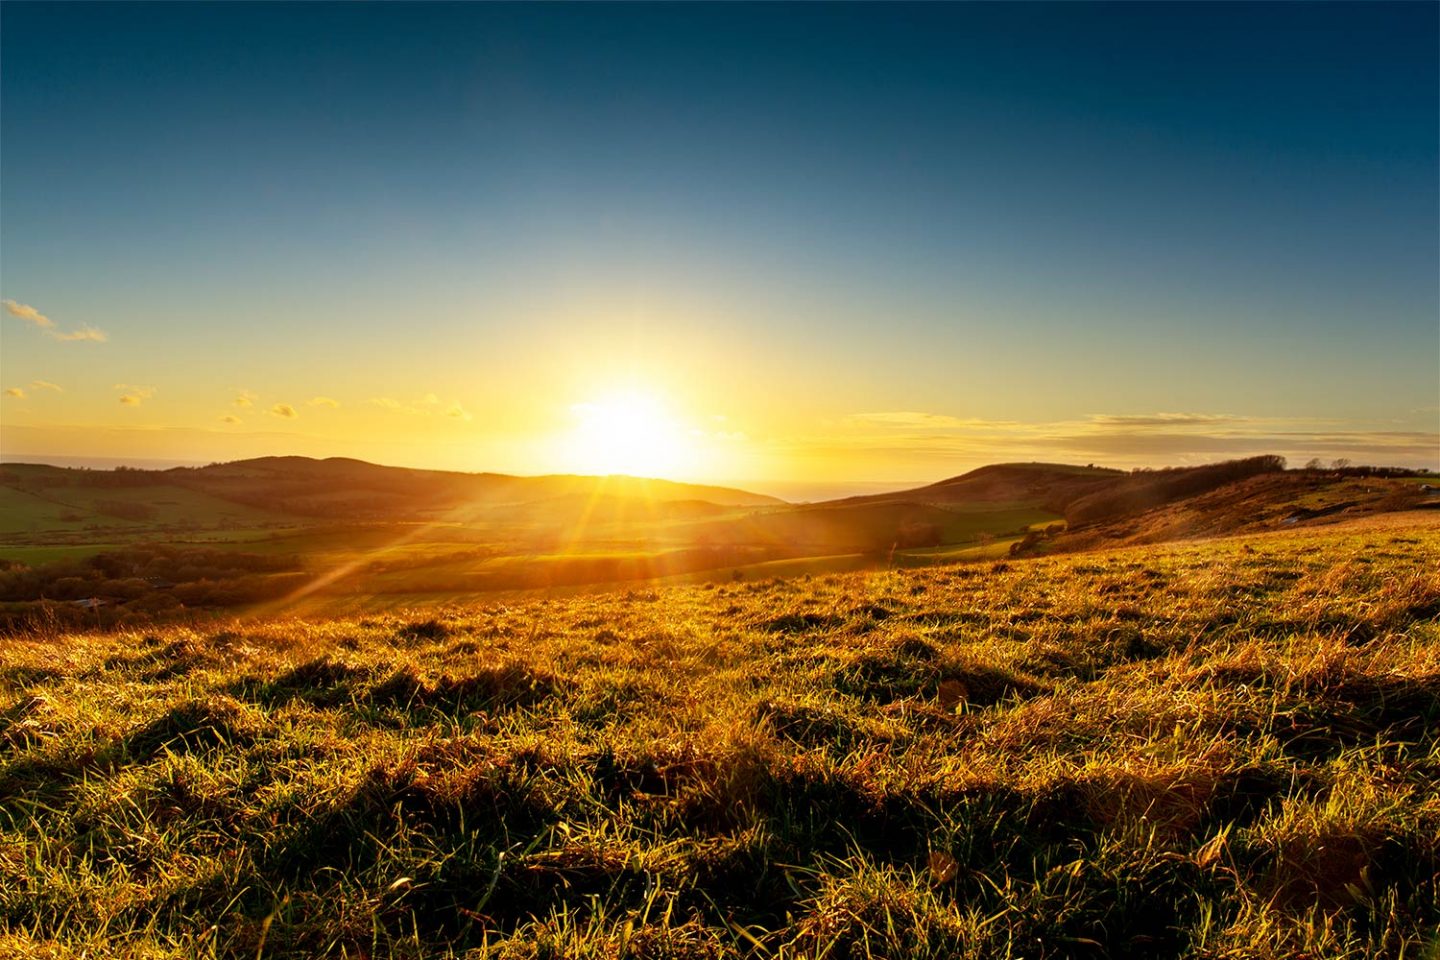
With landscape photography light is very reliant on the weather as we are using the natural light from the sun to expose our photographs. The best time of the day to get perfect light for landscape photography is at sunrise or sunset as this is when the light is the softest, most diffused and is full of golden rich tones.
If you want the best darn photos, aim to shoot during the golden hour. This is the period of time after the sun rises or before the sun sets. It is called the golden hour because of the golden, warm tones that the sun’s light exhibits. Another great time to shoot is during the blue hour, which is the short period of time before the sun rises and after the sun sets, this is again aptly named as it describes the blue tone of the sunlight.
The worst time of day to shoot a landscape is midday when the sun is at its highest in the sky as this creates very unflattering harsh shadows. However, in my experience depending on the weather, you can create beautiful landscape photography during the daytime. If you have some very dramatic clouds in the sky that diffuse this harsh light, you can come out with some very interesting imagery. Try and test this out, you might be surprised at what you can capture. Generally speaking, the best time of day to capture mesmerizing photos as a landscape photographer, is during sunrise and sunset.
How Do You Compose a Landscape Photo Like a Pro?
Another important aspect of landscape photography is learning about composition. This is obviously very important because the way your image is laid out in frame can make or break it. The best way to learn what works and what doesn’t work is experimentation. Take lots of photos from different angles and vantage points, and play around a bit – you’ll soon learn what looks good and what doesn’t. There are however, a few guidelines you can follow that are proven to deliver great compositional results.
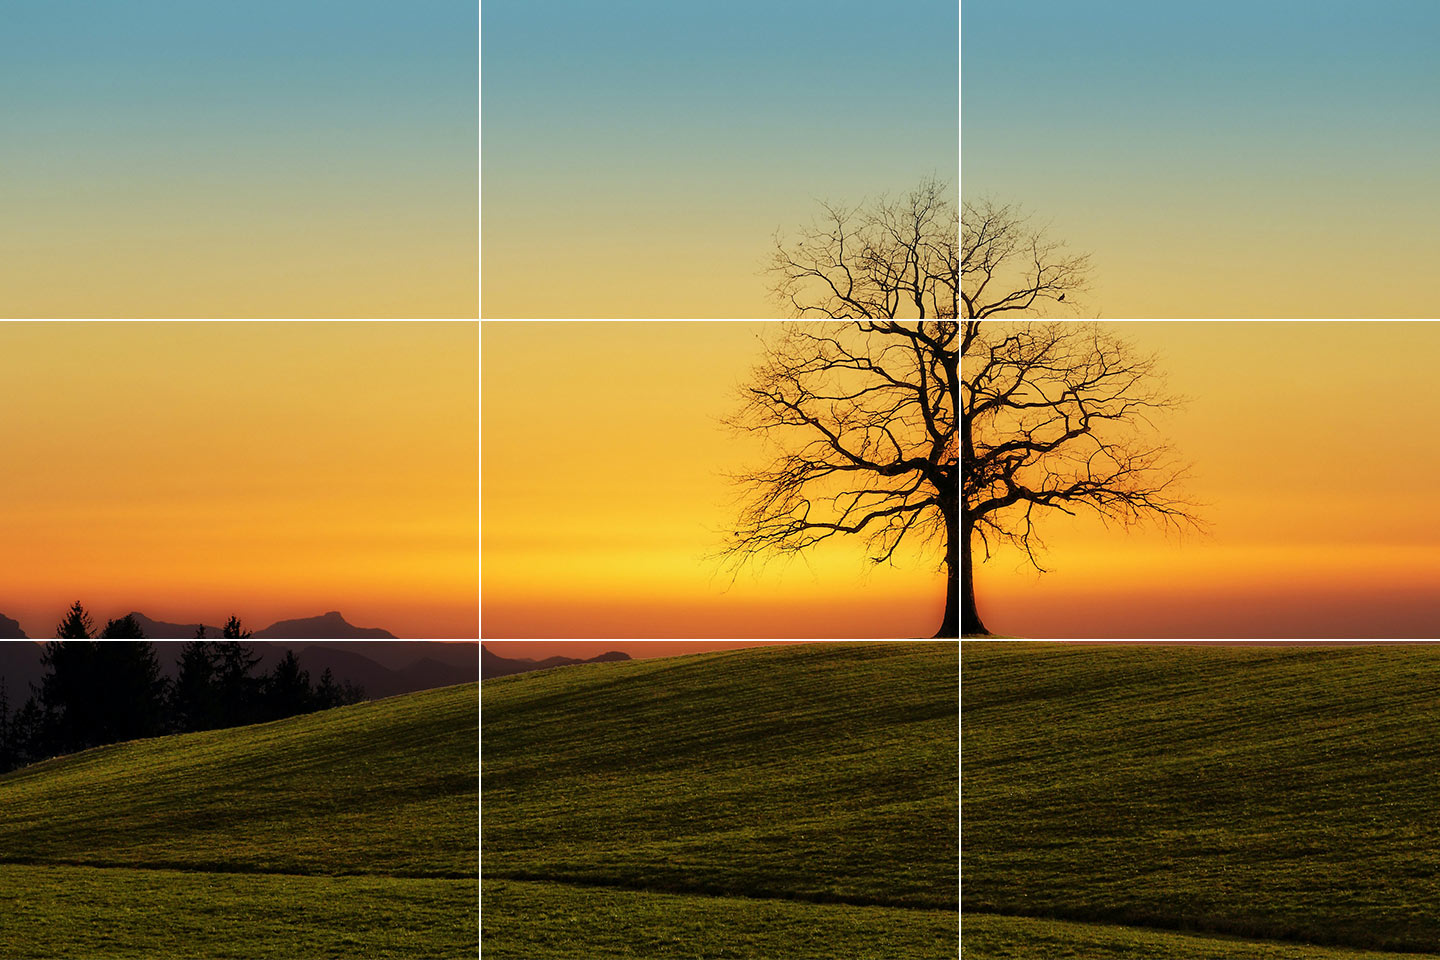
Rule of Thirds
The first technique is one I’m sure you have already heard of if you’ve got any previous experience with photography, it’s the rule of thirds. With the rule of thirds, you divide your frame into three vertical sections and three horizontal sections. You should frame your subject so that it falls on one of these lines. It’s perfect if you can position your subject on the intersection of two lines. You can use one of these horizontal lines to place your horizon line if there is one in your shot.
Symmetry
Symmetry is very attractive and can work really well if you have a subject that is very symmetrical such as a tree or a building. This compositional technique is excellent to use in landscape photography when you have a flawless reflection in your scene, such as in a perfectly still lake. You can position the horizon line in the center of your photo and this will look like a mirror image.
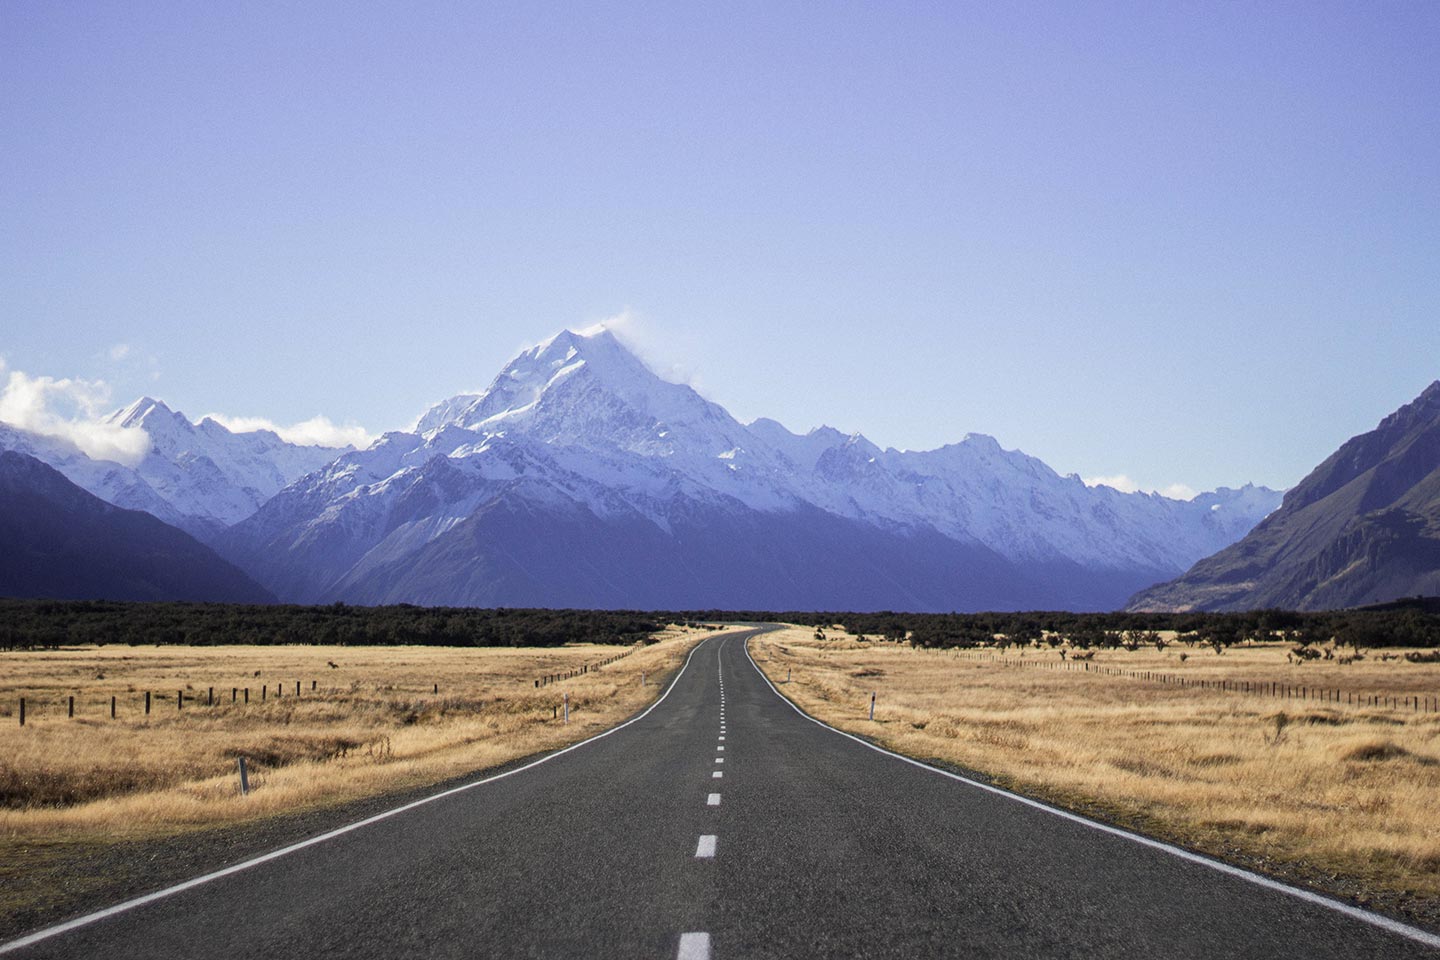
Leading Lines
Now this is a compositional technique I absolutely love to use in my own landscape photography. Using leading lines in your landscape photography is an effective way to draw the viewer’s eye to the main subject of your photo, it’s also great for creating a feeling of depth. Leading lines can be made using roads, paths, rivers and just about anything that creates a line to your main subject. Usually these work best if they start at the bottom of your image and move upwards into the frame.
How Does a Landscape Photographer Edit Photos?
Editing or post processing can really set a landscape photographer apart from the crowd, so is obviously something that’s very important to get right. Adobe Lightroom and Adobe Photoshop are the two programs that most landscape photographers use to edit their images. Lightroom is good because you can use it to make quick quality edits to your photos. Photoshop is something you would use if you need to make more advanced edits such as manipulating the image. For beginners I would suggest getting familiar with Lightroom before making the transition to Photoshop.
If you would like to learn how to use Lightroom and Photoshop I would suggest you give Phlearn a try. Phlearn is an amazing learning resource that specializes in Lightroom and Photoshop tutorials. If you are a complete beginner and would like to learn how to use Lightroom you should check out their free video series that teaches everything you need to know. If you are a little more advanced they have an incredible series that teaches you how to edit landscape and travel photos. If you are serious about becoming a landscape photographer, their extensive tuition is invaluable.
Who is the Best Landscape Photographer?
A very good way to make improvements in your own photography is to have a look at what professional landscape photographers are doing. The first name that comes to mind when thinking of amazing photographers is Ansel Adams, he is likely one of the most famous landscape photographers. He is known for his black and white images of the American West, particularly Yosemite National Park in California.
Looking at more contemporary examples, Daniel Kordan is a great professional landscape photographer to look at. His photography is just about as good it gets in the world of landscapes, which makes him a great photographer to learn from. In fact, you really can learn from him, like many professional photographers nowadays Daniel organizes photography workshops. These workshops are carried out in some of the most amazing landscape locations in the world. It’s an opportunity to learn from a professional with a wealth of knowledge.
How to Become a Better Landscape Photographer?
That’s a lot of information we just covered and as you can see there’s a lot more to landscape photography than simply just clicking the shutter button. If you want to become a better landscape photographer, you simply need to follow these guidelines and practise, practise, practise. The best way to learn is through experience, some of the best landscape photographers took years, sometimes decades to hone their craft.
The best tip I could give to anyone looking to improve their landscape photography is to really get off the beaten path. Go exploring for new landscapes to photograph, this will really set you apart from the crowd. We live in an internet age and it is very easy to find Instagram famous spots to take photos. This is obviously great, but to really become an excellent photographer you need to be a little more original. If you go searching, take loads of photos, experiment and keep in mind everything we have talked about, you will start to become a better photographer.
Disclaimer: The Photographers Passport is a participant in the Amazon Services LLC Associates Program, an affiliate advertising program designed to provide a means for us to earn fees by linking to Amazon and affiliated sites at no additional cost to you. Please note we only link to products & services we personally use or trust.
Pin It!